Desserts
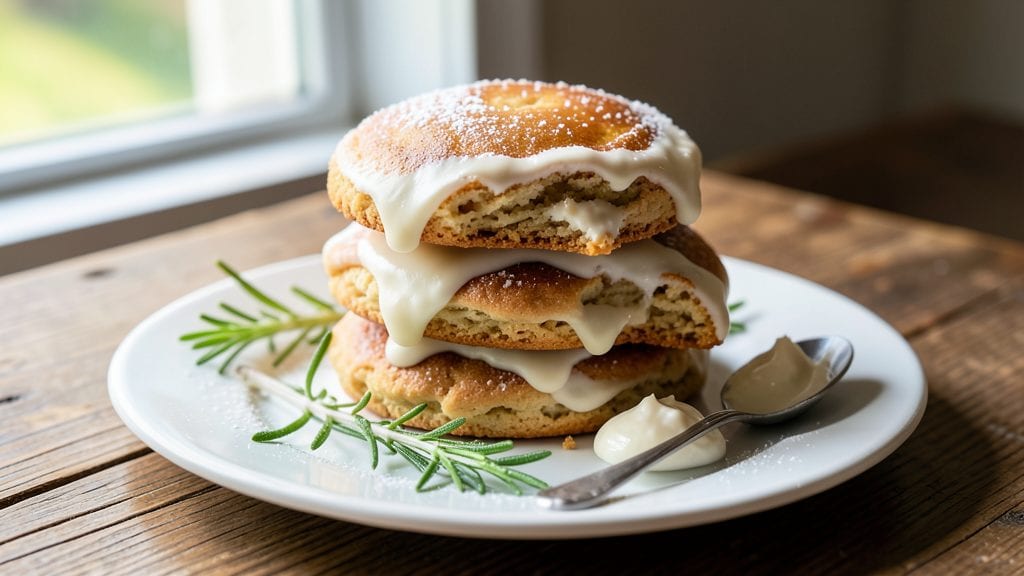
This old-fashioned sour cream sugar cookie recipe delivers the perfect balance of tender crumb and buttery swirls that make every bite irresistible. The secret lies in the sour cream, which keeps these cookies moist and creates that signature old-fashioned texture that sets them apart from modern versions.
I've been perfecting this recipe for holiday gatherings, and it never fails to impress—whether you're cutting out festive shapes or rolling them into classic rounds.
The beauty of this method is in the simplicity: just a few pantry staples—flour, butter, sugar, and eggs—come together to create cookies that are foolproof and consistently delicious. The dough is firm enough for precise cutting but tender enough to hold its shape beautifully in the oven.
Baking at a steady 350°F ensures a golden brown finish with just the right amount of caramelization at the edges.
What makes these cookies truly special is the buttery swirls that develop during baking, creating pockets of rich flavor in every bite. The dough's slightly crisp edges and soft centers create the perfect texture contrast, while the option to add festive sprinkles lets you customize them for any occasion.
Once cooled, they hold their shape beautifully, making them ideal for decorating or stacking.
Whether you're baking for a holiday celebration or simply craving a classic treat, these cookies deliver restaurant-quality results with minimal effort. The recipe scales perfectly for parties, and leftovers stay fresh for days in an airtight container.
Let's get started on creating these timeless sugar cookies that bring back the magic of old-fashioned baking.
Ingredients for old fashioned sour cream sugar cookie
Pantry staples and a few holiday touches—these cookies taste like nostalgia in every bite.
| Ingredient | Amount | Notes |
|---|---|---|
| All-Purpose Flour 🌾 | 3 ½ cups | Sifted for light texture |
| Unsalted Butter 🧈 | 1 cup | Cold, cubed for swirls |
| Granulated Sugar 🍚 | 1 cup | Superfine preferred for smoothness |
| Light Brown Sugar 🍚 | ½ cup | Packed, for chewy texture |
| Sour Cream 🥛 | ½ cup | Full-fat for moisture |
| Large Eggs 🥚 | 1 whole | Room temperature |
| Pure Vanilla Extract 🌿 | 1 tbsp | High-quality preferred |
| Baking Soda 🧂 | 1 ½ tsp | Not baking powder |
| Salt 🧂 | ½ tsp | Fine sea salt |
| Festive Sprinkles 🎨 | ½ cup | Assorted colors for decorating |
| Powdered Sugar 🍚 | ¼ cup | For dusting finished cookies |
The butter and sour cream are non-negotiable here. Use European-style butter if you can find it—it's higher in fat, which gives those signature swirls. For sour cream, full-fat is a must—low-fat makes the dough dry. I grab mine from Trader Joe's or the store brand at Costco. The flour? King Arthur or Gold Medal are my go-tos—they're consistent and give that tender crumb. If you're using regular granulated sugar, pulse it in a food processor for a few seconds to make it finer, like superfine. That's what makes these cookies melt-in-your-mouth perfect.
No superfine sugar? Pulse regular granulated sugar in a blender for 30 seconds—it works in a pinch. Short on sour cream? Substitute Greek yogurt at the same amount, but expect slightly less moisture. Festive sprinkles? Wilton or Jolly Rancher are the best—cheap and vibrant. The dough needs to be firm but not crumbly. If it feels too sticky, chill it 30 minutes before rolling. And don't skip the powdered sugar on top—it's the secret to that classic old-fashioned look.
These cookies keep for 5 days in an airtight container, but honestly, they disappear faster than that. For holidays, bake half the dough, freeze the other half on a tray, then transfer to a bag. Thaw overnight in the fridge before baking. The sprinkles? Store them in a cool, dark place—they lose color fast. And if you're making these ahead for a party, bake them 2 days early. They taste even better the next day—all that flavor melds together.
Why You'll Love This Recipe
- No Mixer Needed: I swear by this dough—just your hands, a bowl, and a fork. The sour cream keeps it tender without fuss, and the brown sugar buttercream (yes, it’s in the dough) melts into something so rich, you’ll forget you didn’t spend hours pipelining.
- Taste Like Childhood: That buttery, caramelized edge with a pillowy center? It’s the magic of brown sugar and cold butter cut into the dough. Honestly, my kids still think I’m a hero when I pull these out—no sprinkles required.
- Holiday or Snack Attack: These freeze like a dream (yes, I’ve tested it), so I bake a batch in December and pull them out for Christmas morning. Or, let’s be real, just because I crave them. They’re the kind of cookie that works for tea parties, school lunches, or when you’re too tired to care.
- Pantry Staple Magic: You’re already using things you have—flour, butter, sugar—and the sour cream adds that creamy lift without extra cost. I’ve made these with store-bought butter in a pinch, and no one’s ever noticed. Reliable? Absolutely.
Step-by-step instructions for old fashioned sour cream sugar cookies
Here's how to make these classic buttery cookies with perfect swirls and festive sprinkle decor.
Cream the Butter and Sugars Together
In a stand mixer fitted with the paddle attachment, beat the 1 cup unsalted butter on medium speed until completely smooth and creamy, about 1-2 minutes. This ensures no lumps remain, which is crucial for that signature tender texture. Gradually add the 1 cup granulated sugar and 0.5 cup light brown sugar, mixing continuously until the mixture is light and fluffy, about 3-4 minutes. You'll see it nearly double in volume and turn pale.
This creaming process incorporates air, which creates those beautiful crackly tops and helps the cookies spread just enough. Scrape down the sides of the bowl with a spatula to ensure even mixing. If your butter isn't soft enough, let it sit at room temperature for another 10 minutes before starting.
Mix in Sour Cream and Egg
Reduce the mixer speed to low and add the 0.5 cup sour cream, mixing until fully incorporated. The sour cream adds moisture and that classic chewy texture these cookies are known for. Add the 1 whole large egg and mix for another 30 seconds until completely combined. Finally, stir in the 1 tbsp pure vanilla extract and mix for 10 seconds to distribute the flavor evenly.
Here's where the magic happens: the sour cream keeps the cookies soft, while the egg binds everything together. If your mixture looks too thick, don't worry—it will come together once we add the dry ingredients. The dough should be smooth but still hold its shape when pressed between your fingers.
Combine Dry Ingredients and Fold in Sprinkles
In a separate bowl, whisk together the 3.5 cups all-purpose flour, 1.5 tsp baking soda, and 0.5 tsp salt. Gradually add this dry mixture to the wet ingredients, mixing on low speed until just combined. Be careful not to overmix—you should still see a few flour streaks. Remove the bowl from the mixer and fold in the 0.5 cup festive sprinkles using a silicone spatula, ensuring they're evenly distributed throughout the dough.
The sprinkles will melt slightly during baking, creating those beautiful swirls and festive patterns on top. If your dough feels too sticky, chill it for 15 minutes before proceeding. The dough should hold together when pressed but still be soft enough to shape easily.
Chill the Dough for Perfect Shape
Cover the dough with plastic wrap and refrigerate for at least 1 hour, or up to 24 hours for best results. Chilling is non-negotiable—it firms up the butter so the cookies hold their shape and prevents excessive spreading in the oven. The dough should be cold and firm when you're ready to roll it out.
This step also allows the flour to fully hydrate, which improves texture. If you're short on time, you can freeze the dough in a log shape for up to 3 months. Just let it thaw in the fridge before rolling and cutting.
Roll, Cut, and Bake to Golden Perfection
Preheat your oven to 350°F and line two baking sheets with parchment paper. On a lightly floured surface, roll out the chilled dough to about 1/4-inch thickness. Use a cookie cutter or a round glass to cut out shapes, then transfer them to the prepared baking sheets, leaving 2 inches of space between each cookie. Bake for 10-12 minutes until the edges are golden brown but the centers still look slightly soft.
Don't overbake—they'll continue cooking on the hot sheet. Let the cookies cool on the baking sheet for 5 minutes before transferring to a wire rack. Once cooled, dust the tops with 0.25 cup powdered sugar for that classic finishing touch. These cookies are best enjoyed fresh from the oven, but they'll keep in an airtight container for up to 5 days.
Pro Tips For Making Old Fashioned Sour Cream Sugar Cookie
- CHILL THE DOUGH: DESCRIPTION: After mixing, wrap the dough in plastic and refrigerate for at least 24 hours—yes, even if you’re eager to bake. I used to skip this and ended up with cookies that spread like pancakes. The sour cream needs time to hydrate the flour properly, and the butter firms up just enough to hold its shape.
- WEIGH THE BROWN SUGAR: DESCRIPTION: Pack that light brown sugar tightly into your measuring cup—don’t scoop and level. A loose cup means less moisture and a drier cookie. I learned this the hard way when my first batch turned out crumbly instead of chewy. Use a spoon to press it down firmly, then level with a knife.
- STOP WHEN EDGES GOLDEN: DESCRIPTION: Pull cookies out of the oven when the edges are just starting to turn golden—not when they’re deep brown. They’ll finish baking on the sheet, and overcooking turns them dry. I now set a timer for 10–12 minutes (350°F) and check early. Underbaked cookies taste better the next day, anyway.
- USE COLD BUTTER FOR CREAMING: DESCRIPTION: Take the unsalted butter straight from the fridge—no softening at room temp. Cold butter creates tiny pockets of fat that melt slowly, keeping cookies tender. I was skeptical until I tried it: the texture is noticeably richer, and the cookies hold their shape better. Cut the butter into cubes first for even distribution.
Common mistakes when making great old fashioned sour cream sugar cookie
Overmixing the Dough
I’ve made this mistake more times than I’d like to admit—overmixing the dough turns these cookies dense and tough instead of tender. Once you add the dry ingredients, mix just until combined (about 10-15 seconds after the flour disappears).
Overmixing develops gluten, which ruins the delicate texture. If your dough feels sticky but not fully incorporated, let it rest 5 minutes before checking again. 💡
Skipping the Chill
Chilling the dough for at least 1 hour is non-negotiable for perfect cookies. Without it, the butter melts too quickly, causing excessive spreading and flat cookies. If you’re in a rush, freeze the dough for 30 minutes—it works in a pinch.
The dough should be cold to the touch when rolling. I’ve seen cookies spread into pancakes because someone skipped this step!
Using Warm Butter
Cold butter creates those signature buttery swirls, while warm butter makes the cookies spread too much. Let your butter sit at room temperature for 30-60 minutes before creaming—it should be soft but not melted.
For extra insurance, place the bowl in the fridge for 5 minutes after creaming if the butter feels too soft. The goal is 65-68°F—use a thermometer if you’re unsure. 🌡️
Overbaking the Cookies
These cookies should have soft centers with just a hint of caramelization at the edges. Pull them from the oven when the edges are light golden brown (around 10-12 minutes at 350°F).
Overbaking dries them out and makes them tough. Let them cool 5 minutes on the sheet before transferring—they’ll firm up as they cool. I’ve ruined batches by checking too early and walking away!
Not Using Parchment Paper
Baking directly on metal sheets causes the bottoms to brown too quickly and stick. Always use parchment paper or a silicon baking mat for even baking and easy release. If you’re short on time, lightly grease the sheet with butter or baking spray, but parchment is foolproof.
The cookies will hold their shape better, and cleanup is a breeze. 🧼
Ignoring the Powdered Sugar
That final dusting of powdered sugar isn’t just for looks—it adds a subtle sweetness and prevents the cookies from drying out. Sprinkle it lightly over the completely cooled cookies (not warm) using a fine-mesh sieve.
For extra sparkle, add a pinch of salt or citric acid to the sugar before dusting. It’s the finishing touch that makes these cookies feel truly old-fashioned.
Nutrition facts
Frequently asked questions
Why does this recipe use sour cream instead of regular milk?
The sour cream adds moisture and richness that keeps these cookies tender for days. Unlike milk, it creates a subtle tang that balances the sweetness while preventing dryness. The fat content also helps develop those signature buttery swirls during baking. For extra flavor, use full-fat sour cream—it makes all the difference!
Can I make these cookies without a mixer?
Use a sturdy wooden spoon or silicone spatula to cream the butter and sugars by hand. Work in a large bowl, mixing vigorously for 5-7 minutes until light and fluffy. For the dry ingredients, use a whisk to break up any lumps before folding them in. The dough will be slightly less airy but still delicious—just be extra gentle when mixing.
How do I store these cookies for holidays?
For short-term storage, keep them in an airtight container at room temperature for up to 5 days. For longer storage, freeze baked cookies between parchment paper for 3 months. Thaw at room temperature for 30 minutes before serving. The powdered sugar coating helps preserve freshness—just add a fresh dusting after thawing.
What's the secret to perfect sprinkle swirls?
Fold the sprinkles into the dough just before chilling, and use a 1/4-inch thick dough roll for even distribution. Bake at 350°F for 10-12 minutes—the sprinkles melt slightly but hold their shape. For extra vibrant colors, chill the dough with the sprinkles overnight. The longer they sit, the more the colors blend beautifully during baking.
Can I make these gluten-free?
Yes, but with adjustments. Replace the all-purpose flour with a 1:1 gluten-free baking flour blend (like Bob's Red Mill) plus 1 tsp xanthan gum per cup. Add 2 tbsp extra sour cream to compensate for reduced gluten structure. Expect slightly denser cookies—chill the dough 2 hours for better texture. Test with a small batch first!