Desserts
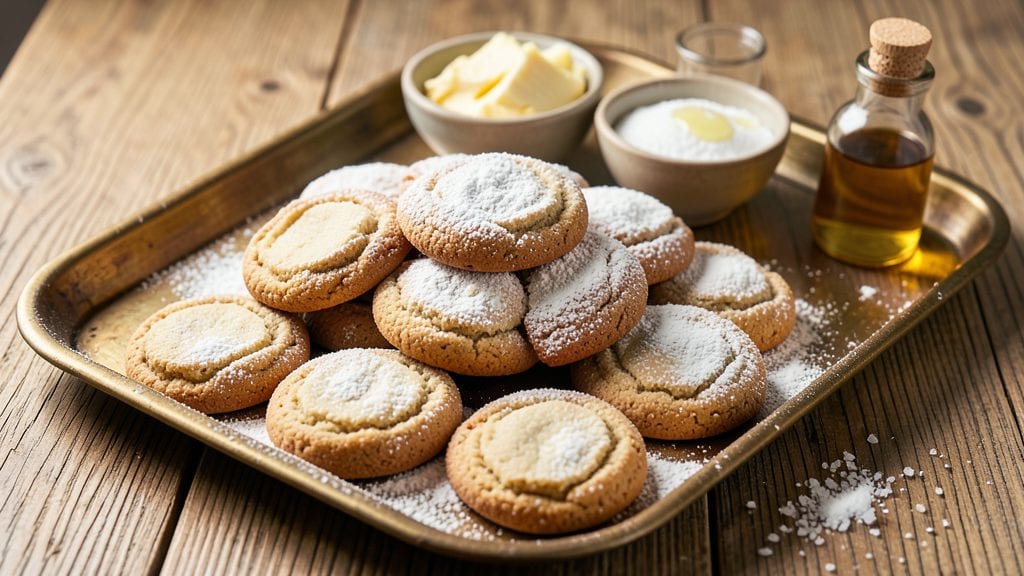
Grandma's sugar cookie recipe brings back memories of holidays past with its perfect balance of sweet vanilla flavor and crisp edges. The secret lies in chilling the dough just right—this simple step transforms tender cookies into the classic texture we all love.
I've baked these for decades, and they never fail to impress, whether shaped by hand or piped with festive designs.
What makes these cookies special is their versatility—traditional rolling and cutting works perfectly, but a piping bag adds that professional touch for holidays. The dough is foolproof, requiring just basic ingredients and a few key techniques like proper rolling thickness and even baking times.
With a 350°F oven and 10-12 minutes per batch, you'll have warm, fragrant cookies ready for decorating.
The result is a batch of cookies with that signature vanilla crunch and melt-in-your-mouth centers, holding their shape beautifully whether you go for classic rounds or intricate holiday shapes.
The frosting possibilities are endless—powdered sugar glaze for simplicity or royal icing for detailed decorating. These cookies freeze perfectly too, making them ideal for holiday prep.
Whether you're baking for Christmas mornings or just craving a taste of nostalgia, this recipe delivers every time. The key is patience—chilling the dough and letting the oven preheat fully ensures perfect results. Let's get baking these timeless treats that taste like home.
Ingredients for grandma's sugar cookie
Basic pantry staples transform into nostalgic holiday cookies with just a few key techniques.
| Ingredient | Amount | Notes |
|---|---|---|
| All-Purpose Flour 🌾 | 4 cups | Sifted for light texture |
| Granulated Sugar 🍚 | 1 cup | White sugar preferred |
| Unsalted Butter 🧈 | 1 cup | Cold, cubed for chilling |
| Pure Vanilla Extract 🍯 | 2 tsp | High-quality for best flavor |
| Large Eggs 🥚 | 1 whole | Room temperature preferred |
| Cream of Tartar 🧂 | ½ tsp | For tender texture |
| Baking Soda 🍞 | ½ tsp | For lift and spread |
| Kosher Salt 🧂 | ½ tsp | Fine grain preferred |
| Powdered Sugar 🍚 | 1 cup | For glaze or dusting |
| Heavy Cream 🥛 | ½ cup | For royal icing option |
| Food Coloring 🎨 | 1 tbsp | Optional for decorating |
| Sprinkles 🌈 | 1 cup | Assorted for festive touch |
The butter and flour are your foundation—cold butter is non-negotiable for that signature crunch. Grab European-style butter from Whole Foods or Trader Joe's if you can, but regular unsalted works too. Sift the flour with the cream of tartar and baking soda first—this prevents lumps and gives those cookies their signature tender bite. I always double-check my vanilla extract isn't imitation; Nielsen-Massey is my go-to for that real vanilla flavor. The powdered sugar should be fine and lump-free—sift it again if you're using it for glaze. For the egg, room temperature makes all the difference—just 10 minutes on the counter does the trick.
No cream of tartar? Substitute with lemon juice at half the amount—it's the acid that keeps these cookies tender. Short on butter? Coconut oil works in a pinch, but the flavor won't be identical. For the royal icing, Meringue Powder from Wilton saves time—just mix with powdered sugar. Want extra crunch? Add 1 tbsp cornstarch to the dough. The vanilla extract can be swapped for vanilla bean paste if you're feeling fancy, but regular extract is perfect for everyday baking. And if you're piping, a piping bag with a star tip gives that classic holiday look.
This dough keeps for 3 days in the fridge wrapped tightly, or 6 months frozen between parchment. Chill it at least 2 hours before rolling—this is where the magic happens. Baked cookies stay fresh for 5 days in an airtight container. I always bake half, then freeze the rest on a tray before transferring to bags. For decorating, parchment-lined trays prevent sticking, and a pastry brush makes glaze application a breeze. The sprinkles? Use them within 3 months of purchase for best color and texture.
Why You'll Love This Recipe
- No-Mess Mixing: The dough comes together in five minutes—just cream butter and sugar, toss in eggs and vanilla, then fold in flour. No electric mixer needed, no sticky fingers, just smooth, buttery magic with zero fuss.
- Buttery Vanilla Bomb: That creamed butter and pure vanilla extract? It’s like a hug in cookie form. The sugar caramelizes just enough for a tender crunch, but the center stays soft—exactly how cookies should be.
- Holiday or Snack Attack: Decorate them for Christmas, pack them in lunchboxes, or just eat them straight from the jar. The dough freezes like a dream, so you can prep a batch now and pull them out whenever cravings (or guests) strike.
- Pantry Staple Power: Five ingredients, all things you already have. No specialty items, no last-minute grocery runs—just flour, sugar, butter, eggs, and vanilla. And if you bake a double batch? They’ll disappear faster than you can say “seconds, please.”
Step-by-step instructions for Grandma's sugar cookies
Here's how to make these nostalgic, buttery cookies that hold their shape perfectly for piping.
Cream Butter and Sugar Until Light and Fluffy
In a stand mixer fitted with the paddle attachment, combine the 1 cup unsalted butter and 1 cup granulated sugar. Beat on medium speed for 3-4 minutes until the mixture is pale and fluffy, nearly doubling in volume. You'll see ribbons form when you lift the paddle—this is your signal the butter is properly aerated.
This step is crucial for tender cookies. If you're using cold butter straight from the fridge, let it sit at room temperature for 30 minutes first. Cold butter won't cream properly and will leave you with dense cookies instead of that classic tender crunch.
Add Egg, Vanilla, and Dry Ingredients
Add the 1 whole large egg and 2 teaspoons pure vanilla extract to the butter-sugar mixture. Beat on low speed for 30 seconds until combined. In a separate bowl, whisk together the 4 cups all-purpose flour, 0.5 teaspoon cream of tartar, 0.5 teaspoon baking soda, and 0.5 teaspoon kosher salt. Gradually add the dry ingredients to the wet mixture, mixing on low speed until just combined.
Here's the thing—don't overmix. You want to see a few flour streaks remaining in the dough. Overmixing develops gluten, which makes cookies tough instead of tender. Once the dough comes together, remove the bowl from the mixer and fold in the 1 cup sprinkles by hand using a silicone spatula.
Chill the Dough for Perfect Shape
Divide the dough into two equal discs, wrap each tightly in plastic wrap, and refrigerate for at least 2 hours or up to 24 hours. This chilling step is non-negotiable for two reasons: first, it firms up the butter so the cookies hold their shape when piping, and second, it allows the flour to fully hydrate for that perfect tender crunch.
I know it's tempting to skip this step, but trust me—your cookies will spread wildly and lose their festive details if you don't chill. If you're in a hurry, you can freeze the dough discs for 30 minutes as a shortcut, but chilling overnight gives the best results.
Preheat and Pipe the Cookies
Preheat your oven to 375°F and line two baking sheets with parchment paper. Roll out one disc of chilled dough to ¼-inch thickness on a floured surface. Use a piping bag fitted with your favorite tip to pipe out 2-inch circles or festive shapes onto the prepared baking sheets, spacing them 2 inches apart. Gently press a few extra sprinkles onto each cookie if desired.
Bake for 8-10 minutes until the edges are just beginning to turn golden. The centers should still look slightly underdone—they'll finish cooking as they cool. Rotate the baking sheets halfway through for even baking. Remove from the oven and let cool on the baking sheet for 2 minutes before transferring to a wire rack.
Optional Royal Icing Decoration
For that extra festive touch, combine 1 cup powdered sugar, 0.5 cup heavy cream, and 1 tablespoon food coloring in a bowl. Beat with a hand mixer until smooth and pipeable. Transfer to a piping bag fitted with a small tip and decorate the cooled cookies with festive borders or patterns. Let the icing set for 30 minutes before serving.
These cookies will keep in an airtight container at room temperature for up to 5 days, though I doubt they'll last that long. The secret to their perfect texture lies in that proper chilling and careful baking—don't rush either step if you want cookies that taste just like Grandma's!
Pro Tips For Making Grandma'S Sugar Cookie
- CHILL THE DOUGH: I learned this the hard way—rolling out warm dough makes it sticky and uneven. Wrap the dough in plastic and refrigerate for at least 1 hour (or up to 48 hours for better flavor). The cold butter prevents spreading, and the texture becomes silky instead of gummy.
- WEIGH THE BUTTER: Your butter should be soft but cool—pressable but not greasy. If it’s too soft, chill the bowl for 10 minutes before mixing. Too soft? The cookies spread too much. (Yes, even if you’re impatient like me.)
- DON’T OVERMIX: Stop mixing the moment the dough comes together. Overworking it develops gluten, making cookies tough instead of tender. Use a wooden spoon or your hands—just until it’s crumbly and clumps when pressed.
- USE A LIGHT HAND: Pack the flour loosely into the measuring cup—don’t scoop and level. Pressing it down adds extra weight, making cookies dense. Spoon it in, then sweep off the excess for the perfect crisp-yet-chewy texture. (Your future self will thank you.)
Flavor customization for this recipe
Citrus Zest Twist
Add 1 teaspoon lemon or orange zest to the dough for a bright, citrusy twist that cuts through the sweetness. I like to use organic lemons from Whole Foods for the most vibrant flavor.
This works especially well with white chocolate chunks folded into the dough—just ½ cup adds a luxurious touch. The zest infuses beautifully during baking, leaving a subtle citrus aroma that pairs perfectly with vanilla. 🍊
Spiced Chai Flavor
For a cozy fall version, replace the vanilla with 1 teaspoon chai spice blend (mix ½ tsp cinnamon, ¼ tsp cardamom, ¼ tsp ginger, and ⅛ tsp cloves). I love adding ½ cup chopped pecans to the dough for extra crunch.
The warm spices complement the butter beautifully, making these cookies taste like a hug. Serve with hot chai tea for the ultimate cozy pairing. 🍂
Brown Butter Caramel
Brown the butter before creaming for a nutty, caramelized depth that transforms these cookies into something extraordinary. Cook 1 cup butter in a saucepan over medium heat until golden brown and nutty-smelling (about 5-7 minutes). Let it cool slightly before mixing with sugar.
The flavor is rich and complex—like a cross between classic sugar cookies and caramel. I like to add ¼ cup caramelized sugar to the dough for extra decadence. 🥛
Gluten-Free Adaptation
For a gluten-free version, substitute the all-purpose flour with a 1:1 gluten-free baking flour blend like King Arthur Measure for Measure. Add ½ teaspoon xanthan gum to improve texture. Reduce the sugar slightly to ¾ cup since gluten-free flours can make cookies denser.
The cream of tartar helps maintain tenderness—don't skip it! These cookies hold their shape beautifully when piped, just like the original. 🌾
Salted Caramel Drizzle
After baking, drizzle cooled cookies with salted caramel sauce for a gourmet touch. Warm ½ cup caramel sauce (like Trader Joe's) with 1 teaspoon sea salt until melted, then drizzle over cookies using a spoon.
The salt enhances the sweetness and adds a sophisticated finish. I like to add flaky sea salt on top of the drizzle for extra texture. This upgrade makes them feel like a bakery creation. 🍬
Coconut Macadamia Crunch
Fold ½ cup toasted coconut flakes and ½ cup chopped macadamia nuts into the dough for a tropical-inspired twist. Toast the coconut in a dry pan over medium heat for 2-3 minutes** until golden and fragrant.
The nuts add buttery richness while the coconut brings a subtle sweetness. These cookies have a delightful texture contrast with every bite. Perfect for summer gatherings or luau-themed parties! 🥥
Nutrition facts
Frequently asked questions
Why does chilling the dough matter for these cookies?
Chilling the dough for at least 2 hours prevents excessive spreading and helps maintain the piped shapes. The cold butter firms up, giving the cookies their signature crisp edges and tender centers. Skipping this step often results in flat, cake-like cookies instead of the classic crunchy texture.
Can I use a cookie cutter instead of piping?
Roll out the chilled dough to ¼-inch thickness and cut shapes with your favorite cutter. Just press the cutter straight down without twisting to prevent jagged edges. For best results, place cut cookies on a floured tray and bake for 8-10 minutes at 375°F. The same chilling rules apply for shape retention.
How do I store these cookies for holidays?
Keep baked cookies in an airtight container at room temperature for up to 5 days. For longer storage, freeze unbaked dough discs for 6 months or baked cookies for 3 months. Thaw frozen dough in the fridge overnight before rolling. The secret is parchment paper between layers to prevent sticking.
What's the best way to prevent cookies from sticking?
Line baking sheets with parchment paper or silicone baking mats. For extra insurance, dust the parchment with flour before piping. Avoid overcrowding the tray—space cookies 2 inches apart for even baking. Let them cool on the sheet for 2 minutes before transferring to prevent breaking delicate shapes.
Can I make these gluten-free or vegan?
For gluten-free, use a 1:1 baking blend with ½ tsp xanthan gum and reduce sugar to ¾ cup. For vegan, substitute the butter with vegan butter and the egg with 1 flax egg (1 tbsp ground flax + 3 tbsp water). Both versions require careful chilling—these adaptations work best with piping bags for shape control.