Salads
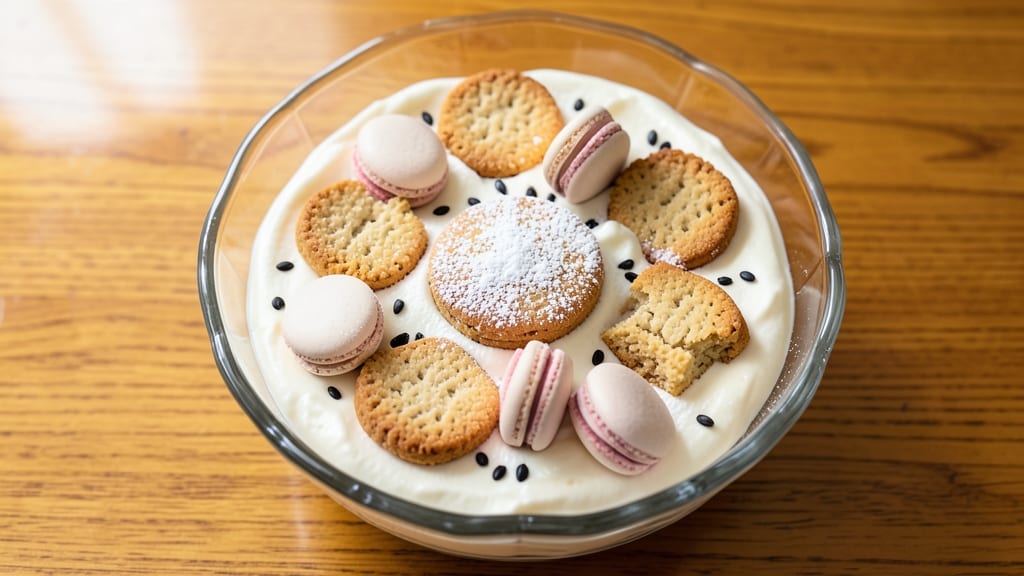
This cookie salad recipe—creamy, crunchy, and bursting with vanilla bean—turns humble cookies into a luscious no-bake dessert ideal for gatherings or sudden sweet tooth moments.
The secret lies in balancing rich cream cheese with crumbled cookies and velvety vanilla bean, creating layers of texture and flavor that feel indulgent yet effortless. I developed this recipe after realizing how quickly store-bought cookie crumbles could elevate a simple dessert into something restaurant-worthy with minimal effort.
The foundation of this dessert is a smooth, creamy vanilla bean mixture that binds the cookie crumbles without overpowering their buttery flavor. Using high-quality vanilla extract and cream cheese ensures a luxurious mouthfeel, while the cookie crunch adds satisfying texture in every bite.
This recipe works with store-bought cookies or homemade—just adjust the crumble size for the perfect balance. The result is a dessert that’s visually striking with its golden swirls and creamy layers, making it ideal for special occasions or when you want to impress without stress.
What makes this dessert truly special is its versatility—add fresh berries for brightness, a drizzle of caramel for extra decadence, or even a sprinkle of sea salt to enhance the sweetness. The creamy base holds together beautifully, whether served chilled for hours or enjoyed fresh from the fridge.
Presentation is key: layer the ingredients in a glass dish for an elegant look, or serve in individual cups for easy portioning. This recipe proves that desserts don’t have to be complicated to feel extraordinary.
For those with dietary preferences, substitutions are simple: use gluten-free cookies or vegan cream cheese without sacrificing texture or flavor. The technique is foolproof, and the ingredients are likely already in your pantry.
Whether you’re hosting a gathering or treating yourself, this cookie salad delivers a dessert that’s as delightful to make as it is to eat. Let’s get started!
Ingredients for cookie salad
Twelve ingredients transform into a luxurious no-bake dessert that balances creamy vanilla richness with crunchy cookie texture.
| Ingredient | Amount | Notes |
|---|---|---|
| Vanilla Bean Seeds 🌿 | 1 whole | Scraped from one quality vanilla pod |
| Heavy Whipping Cream 🥛 | 2 cups | Full-fat for optimal texture |
| Cream Cheese 🧀 | 16 oz | Room temperature, full-fat preferred |
| Powdered Sugar 🍚 | 1 ½ cups | Sifted for smooth texture |
| Pure Vanilla Extract 🍯 | 1 tbsp | High-quality Madagascar preferred |
| Assorted Cookies 🍪 | 6 cups | Crumbled, store-bought or homemade |
| Unsalted Butter 🧈 | ½ cup | Cold, cubed for crunch |
| Lemon Juice 🍋 | 1 tbsp | Freshly squeezed for brightness |
| Sea Salt 🧂 | ¼ tsp | Fine grain for subtle enhancement |
| Whipped Cream 🥛 | 1 cup | Optional, for garnish |
| Fresh Berries 🍓 | 1 cup | Optional, for garnish and color |
| Caramel Sauce 🍯 | ½ cup | Optional, store-bought or homemade |
The cream cheese and heavy whipping cream form the velvety base—full-fat versions are non-negotiable for that restaurant-quality mouthfeel. For the vanilla, Madagascar vanilla beans deliver the most complex flavor profile (the pods cost more but are worth it), while high-quality pure vanilla extract ensures depth without artificial aftertaste. Store-bought cookies work perfectly, but for a refined touch, use homemade shortbread or chocolate chip cookies—their buttery flavor shines through. The powdered sugar should be sifted to avoid graininess, and if you're using gluten-free cookies, opt for a blend with almond flour to maintain structure. Trader Joe's and Whole Foods carry excellent pre-packaged cookie crumbles if you're short on time, but homemade crumbles add that professional touch.
No vanilla bean? Double the pure vanilla extract—though nothing replaces the natural depth of real vanilla seeds. Substituting vegan cream cheese (like Kite Hill or Tofutti) works beautifully for dietary needs, though texture may vary slightly. For a nut-free option, swap butter for vegetable shortening or coconut oil. The lemon juice brightens the richness, but if you prefer tangier notes, lime juice works equally well. For presentation, fresh berries add vibrant color and acidity, while caramel sauce elevates the dessert to decadent levels. Store-bought caramel (like Smucker's) is convenient, but homemade (simmered sugar + cream) tastes infinitely better. If you're serving this at a gathering, pre-portion the cookie crumbles in small bowls to let guests customize their servings.
This dessert holds beautifully for up to 4 days in the fridge, though flavor peaks at 24 hours when the textures fully meld. For ahead-of-time prep, assemble the creamy base up to 2 days ahead and layer with cookies just before serving. Freeze for up to 3 months by wrapping tightly in plastic—thaw overnight in the fridge before serving. The whipped cream garnish should be added fresh to maintain airiness, while berries and caramel can be piped or drizzled moments before serving. For an elegant presentation, use a glass trifle dish or individual mason jars—layer the creamy base, cookie crumbles, and garnishes in alternating bands for visual appeal. Leftovers? Portion into small containers for grab-and-go treats.
Why You'll Love This Recipe
- No Mixing Madness: I swear by this recipe because it’s literally just folding ingredients together—no beating, no folding in the wrong order, no stress. The cream cheese and whipped cream blend so smoothly you’ll think you’re cheating, and the vanilla bean seeds add those little bursts of magic without any extra work.
- Velvet Vanilla Bliss: This isn’t your basic cookie-flavored dessert—it’s rich, like biting into a snickerdoodle but with that silky-smooth, creamy texture from the whipped cream and cream cheese. The vanilla bean seeds? They make it taste like you slaved over a gourmet dessert, but honestly, it’s just a few extra scrapes of the pod.
- Picnic Party Star: Between us, this is my go-to for potlucks, office parties, or even a lazy Sunday afternoon. It holds up in the heat (unlike some no-bake treats), and you can serve it in a bowl, cups, or even on cookies for dipping. Zero effort, maximum crowd-pleasing.
- Leftovers? More Like Leftovers Loved: Here’s the thing—I always make double. It doesn’t dry out, it doesn’t get weird in the fridge, and it’s still ridiculously good two days later. Plus, the ingredients are cheap enough that you’re not breaking the bank for seconds (or thirds). My freezer stash is proof.
Step-by-step instructions for creamy vanilla bean and cookie crunch delight
This dessert balances rich creaminess with satisfying crunch—every layer is intentional.
Prepare the Vanilla Bean Cream Base
In a medium mixing bowl, combine the 2 cups heavy whipping cream and 16 oz cream cheese (cut into cubes). Use a hand mixer on medium speed for 3-4 minutes until completely smooth and fully incorporated. This step ensures no lumps remain in your final dessert.
In a separate small bowl, scrape the seeds from the 1 whole vanilla bean and whisk them with the 1.5 cups powdered sugar, 1 tbsp pure vanilla extract, 1 tbsp lemon juice, and 0.25 tsp sea salt. Gradually pour this sugar mixture into the cream mixture while mixing on low speed. This prevents powdered sugar from clumping and creates a silky texture.
Incorporate the Cookie Crunch Layer
Reduce the mixer speed to low and add the 6 cups assorted cookies (pre-crumbled to uniform pieces). Mix just until the cookies are evenly distributed—overmixing will turn them into a paste. The texture should resemble wet sand with visible cookie fragments throughout.
For the crunch element, press the 0.5 cup cold unsalted butter (cut into small cubes) into the cookie mixture using a spatula. This creates pockets of buttery crunch that will melt slightly when chilled, enhancing both texture and flavor. Fold gently to maintain the cookie integrity.
Chill for Optimal Texture
Transfer the mixture to a 9x13-inch baking dish lined with parchment paper. Press down firmly with a spatula to create an even surface. Cover tightly with plastic wrap and refrigerate for at least 4 hours or overnight. This chilling period is critical—it allows the cream cheese to fully set while maintaining the cookie crunch.
I recommend chilling overnight if possible. The longer it rests, the more stable the texture becomes, preventing any potential melting when you serve it. The edges should firm up noticeably, but the center will remain slightly yielding—this is perfect for spooning.
Assemble and Garnish
Once chilled, spread the 1 cup whipped cream evenly over the top of the cookie salad. Use a spatula to create gentle swirls for visual appeal. Press the 1 cup fresh berries and 0.5 cup caramel sauce into the whipped cream layer, creating pockets of contrasting colors and flavors.
For presentation, I like to drizzle additional caramel sauce in zigzag patterns and scatter extra cookie crumbs around the edges. This not only enhances the visual appeal but also provides that satisfying crunch with every bite. Serve immediately for the best texture contrast between the creamy base and crunchy elements.
Pro Tips For Making Cookie Salad
- Scrape the Vanilla Bean: Use a sharp knife to split the pod lengthwise and scrape out every last bit of those tiny seeds—don’t just eyeball it. I learned this the hard way when I left half the seeds behind and wondered why my cookie salad tasted underwhelming.
- Whip the Cream Cold: Chill your mixing bowl and beaters for at least 10 minutes before whipping the heavy cream. Cold tools mean cream that holds its shape instead of turning into a sad, lumpy mess—trust me, I’ve seen both.
- Balance the Sugar Gradually: Add powdered sugar to the cream cheese mixture in 2-tablespoon increments while mixing, or you’ll end up with a grainy paste. I used to dump it all in at once, and it took me three batches to realize why my texture was off.
- Let It Rest Before Serving: Give the finished cookie salad 30 minutes in the fridge to let flavors meld and the cream cheese to fully emulsify. Skipping this step means a dish that’s too sweet or too stiff—your guests won’t notice, but you will.
Serving suggestions for this cookie salad
Layered Presentation
Use a glass trifle dish or mason jars for an elegant look—layer the creamy base, cookie crumbles, and whipped cream in alternating bands. I like to start with a thin layer of cookie crumbles at the bottom for texture, followed by the vanilla cream, then repeat.
For individual servings, use 4-ounce mason jars—this makes it perfect for parties or potlucks. 🥛
Garnish Like a Pro
Fresh berries add vibrant color and acidity—try raspberries or blackberries for their deep hues. Drizzle caramel sauce in zigzag patterns with a squeeze bottle for visual appeal.
For extra crunch, scatter crushed pistachios or toasted coconut flakes around the edges. A pinch of flaky sea salt on top enhances the sweetness.
Serve with Style
For a restaurant-worthy finish, pipe whipped cream into rosettes with a star tip before adding berries. Use edible gold leaf or colored sugar for special occasions. Serve with mini spoons for easy scooping—guests will love the interactive presentation. 💫
Portion Control Tips
Divide the dessert into ramekins or small bowls for easy serving. Store leftovers in airtight containers with parchment paper between layers to prevent sogginess. Label containers with the date—this keeps track of freshness for up to 4 days in the fridge.
Themed Serving Ideas
For holiday gatherings, add cinnamon sticks or cranberries to the garnish. For a spring twist, swap cookies for shortbread and top with strawberries and mint leaves. The possibilities are endless—let your creativity guide the flavors! ✨
Make-Ahead Magic
Assemble the base up to 2 days ahead and refrigerate. Add garnishes 1 hour before serving to keep textures fresh. For freezer-friendly prep, portion into ziplock bags—thaw overnight in the fridge before garnishing. This dessert is perfect for last-minute celebrations! 📅
Nutrition facts
Frequently asked questions
Can I use any type of cookie for this dessert?
While classic chocolate chip or shortbread cookies work beautifully, feel free to experiment with flavors like oatmeal raisin, snickerdoodle, or even gluten-free varieties. For extra richness, try adding a mix of both sweet and buttery cookies. Just ensure they're crumbled into uniform pieces for even distribution.
How long should I chill the dessert before serving?
For optimal texture, chill the dessert for at least 4 hours—overnight is ideal. This allows the cream cheese to fully set while maintaining that perfect cookie crunch. The longer it rests, the more stable the texture becomes, preventing any potential melting when you serve it.
Can I make this dessert ahead of time?
Yes! Assemble the base up to 2 days ahead and refrigerate. Add garnishes like whipped cream and berries just 1 hour before serving to keep textures fresh. For freezer prep, portion into ziplock bags and thaw overnight in the fridge—perfect for last-minute celebrations!
What if my whipped cream doesn't hold its shape?
Cold bowls and chilled beaters help stabilize whipped cream. If it still collapses, try adding 1 teaspoon powdered sugar or 1 tablespoon heavy cream to the mix, then whip again. For extra insurance, use stabilizers like meringue powder (½ tsp) or fold in 1 tablespoon mashed marshmallow fluff before piping.
Can I make this dessert vegan?
Swap the cream cheese for vegan cream cheese (like Kite Hill) and use coconut cream instead of heavy whipping cream. For cookies, choose vegan-certified brands or make your own with plant-based butter. The texture will be slightly softer, but the flavor remains rich and satisfying.